Sausage making is both an art and a science. Art because you get to play around with spices in the pursuit of a culinary masterpiece. A science because you have to protect your bangers from bacterial activity.
Making the perfect sausages is an all-inclusive process. You have to make the right decisions beginning with the choice of equipment to the manner of storage.
I’ve been making sausages commercially for over 15 years now. Below is a walk-through of my sausage-making process and the tricks I learned along the way. Discussed are a few tips, and the science behind why you should employ them.
Here’s a quick summary:
- Don’t Skimp on Quality
- Cool the Meat Before Grinding
- Work in Small Batches
- Cut the Meat According to Your Grinder
- Keep the Fat Partially Frozen
- Avoid Beef or Wild Game Fat
- Make Sure You Include 20 – 30% Fat
- Grinding Per Sausage Requirements
- Start With Coarse Plates and Work Your Way Down
- Always Use A Cold Bowl to Collect the Mince
- Use Bread to Push the Last Meat Through the Grinder
- Rest Your Mince
- Use the Right Amount of Salt
- Always Use Non-Iodized Salt in Sausage Making
- Always Use Prepared Spices and Herbs
- Use Precise Scales
- Use Wine Sparingly
- Avoid Disturbing the Binding Proteins
- Use Cold Meat, Casings, and Equipment
- Understand Your Casings
- Prepare the Casings
- Avoid Air Pockets
- Hold Lightly to Prevent Popping Casings
- Preheat the Empty Smokehouse
- Store Overnight Before Cooking
- Wrap Tightly
- Fridge or Freezer
Choose Your Equipment Right
Make sure you have the right equipment for the sausages you want to make. The two most essential pieces in your arsenal are the grinder and stuffer.
Meat Grinder
If you plan to buy your ground meat, skip this part. Jump straight to sausage stuffers. Better still, read on for some of the reasons why you should consider a grinder.
Mincing your meat affords you control over what you eat. You also have the luxury of formulating unique flavors. The upfront expense of a grinder is what discourages most people from the equipment. That need not be the case, though.
If you plan to make sausages for a small family, a grinding and stuffing attachment to your KitchenAid mixer should do. You can also opt for the much cheaper manual grinders. Considering how cheaper it’s to grind your meat, the savings add up. In the end, owning a grinder is less expensive than buying ground meat.
What should you consider when buying a grinder for making sausages?
Material Matters
For the best grinding experience, you want a unit that can be refrigerated. Grinding units work best when cold. The heat generated by the moving parts may also heat the meat they come into contact with, encouraging bacterial activity.
You also want a unit that’s easily dismantled. Not only will it be easy to refrigerate, but it will also be easier to clean. The better you wash your equipment, the lower the risk of bacterial action on the meat, and the better the taste of the sausages.
Always go for food-grade metals or plastics. I prefer metallic grinding parts because they work faster than their plastic equivalents.
Grinding Plates
If you only need to make coarse ground meat, a single coarse plate should do. Medium and fine grinds are a little more complicated. You need to start with a coarse grind and then work your way down to the finer plates, for the best results. With that in mind, go for grinders with multiple grinding plates if you’ll be making fine-ground sausages.
Check out our recommended list of best meat grinders.
Sausage Stuffers
With sausage stuffers, the two most important features are:
- Air Valves
- Ease of Assembly
Air Valves
Some staffers come with a valve to release the air trapped in the meat. These valves will make your work easier, favor stuffers with air valves when shopping.
If your stuffer doesn’t have a valve, no worries. You can always squeeze the air out manually.
Ease of Assembly
You need to keep your equipment cold. It helps if the stuffer is easily dismantled to fit into the freezer. Ease of assembly is also important when cleaning the stuffer. You need a unit that will allow you to reach every inch that comes into contact with the meat.
Check out our recommended list of best sausage stuffers.
Grinding the Meat
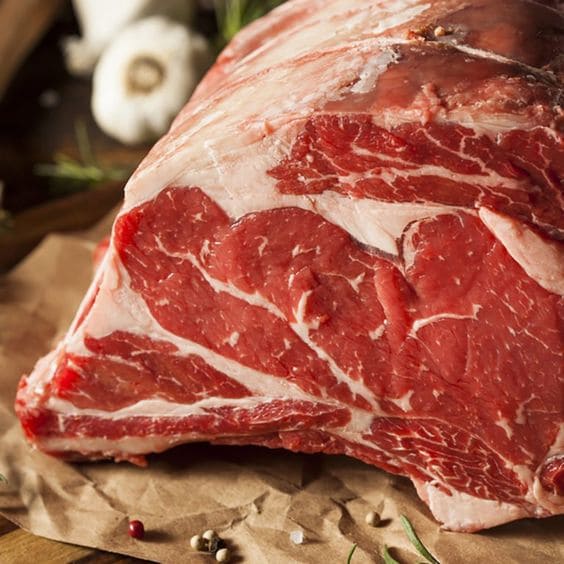
1. Don’t Skimp on Quality
The quality of sausages is only as good as the quality of meat. Whether you’re shopping or hunting for your meat, choose the best cuts.
An example of a prime cut is Boston Butt, which is essentially pork shoulder. This piece has a good fat-to-meat ratio, meaning you won’t have to buy extra fat.
If you don’t like pork, beef shoulder or neck should also work.
That said, you don’t have to go for overly expensive cuts, like the tenderloin. Although these cuts taste fantastic, mincing them for sausages would be a waste. I prefer barbecuing these sections.
2. Cool the Meat Before Grinding
Once you’ve selected your meat, it’s time to chill it along with your equipment.
Working with partially frozen—not solid—meat is a lot easier on your grinder. The mince is also much better because the fat is evenly distributed. Without chilling, the fat will separate from the meat making for a very uncomfortable chewing experience.
You should also ensure that your equipment remains cold. Everything that comes in contact with the meat should be chilled beforehand.
Take your grinder, bowls, and stuffer components, and put them in your freezer. Leave them there for 20 to 30 minutes. They’re ready for use when they’re cold, but not too cold to touch.
The grinding friction may also heat your meat to unhealthy levels. Be especially careful if you plan to store your sausages for a long time. Heat encourages bacterial activity, which in turn reduces the lifespan of your bangers. Make a habit of tossing the meat back into the freezer every time you notice it heat up.
Pro tip
Place your meat in an ice-water bath if your freezer is too quick for your liking. The bath keeps your meat cool without freezing it solid.
3. Work in Small Batches
Working in small batches keeps your meat from softening. Grab a cut or two, and keep the rest in your ice bath or freezer. Keep an eye on the cuts in the cooler to ensure they don’t freeze solid.
When working with a lot of meat, avoid the freezer and use the cold-water baths exclusively. The more the meat, the higher the likelihood that you’ll leave some in the freezer too long.
4. Cut the Meat According to Your Grinder
Cut up the meat into small pieces—around 1-inch, depending on your grinder.
We cut meat for two reasons: For starters, it’ll help the machine. Feeding big chunks of meat to the grinder often blocks the feeding tube. Size your meat per the grinder’s tube diameter.
Another reason why we cut meat is that grinders tear big chunks rather than mincing them. Stuffing large pieces into the machine causes the sinews to wrap around the auger, slowing the grinder. This, in turn, prevents it from slicing through the meat cleanly. What you get is a bad-textured mush.
5. Keep the Fat Partially Frozen
Never work with fresh fully-thawed fat. The grinding friction causes it to lump together. When partially frozen, the fat emulsifies and is evenly distributed in the mince, improving texture and taste.
6. Avoid Beef or Wild Game Fat
As a rule of thumb, always work with pork fat.
Beef fat is yellow, and it isn’t as tasty as pork fat. It won’t add much other than calories to your sausages. The same goes for wild game fat; the ‘gamey’ taste isn’t for everyone.
Some people use goat or sheep fat in their sausages. I strongly advise against this unless the recipe calls for it. These fats have strong tastes that may throw your sausages off balance.
7. Make Sure You Include 20 – 30% Fat
A good sausage is 20% to 30% fat. Fat lubricates the meat and adds flavor. It also acts as a natural binder, giving your sausages good texture.
I know people who prefer lower fat ratios, but I would never recommend it. Sausages with less than 20% fat feel too dry.
8. Grinding Per Sausage Requirements
Once you’re ready to grind, remove your machine and equipment from the freezer and place it on your countertop.
Before you begin, you need to choose which grinding plate to use. You generally have a few choices ranging between coarse—which is a good starter—fine, or something in the middle.
9. Start with Coarse Plates and Work Your Way Down
Plate size is typically a matter of personal preference. However, if you want your mince fine, start with the coarse plate and switch to the fine plate for the second round of grinding. Starting your meat off with a fine grind just overworks the grinder causing it to heat up.
10. Always Use A Cold Bowl to Collect the Mince
Place a cold bowl under the spout of the grinder to collect the minced meat. The idea is to keep the meat cold for as long as possible. The longer the meat stays cold, the shorter the time it spends in your cooler, and the faster you work.
Never use your fingers to push the meat into the grinder – use the included pusher, to avoid accidents.
When the meat begins to soften, toss it back into the freezer. After grinding the meat, place a plastic wrap over the bowl and leave it in the freezer for another 30 minutes.
11. Use Bread to Push the Last Meat Through the Grinder
Getting everything through the grinder can be difficult. To help with this, push a slice of bread through the hopper. Continue until all the meat clears from the plate. Don’t use too much bread, or you’ll affect the taste of your bangers.
12. Rest Your Mince
Rest your ground meat for a few minutes. The meat requires time to develop actin and myosin. These are the proteins responsible for making mince sticky enough to shape.
After mincing, I always throw the meat into the freezer for a couple of minutes. Actin and myosin develop as the meat cools in preparation for the next step—two birds one stone. Next comes the kneading process. A mixer is probably best since the mince is freezing at this point.
Pro tip
Wash your equipment as the meat rests. Cleaning is a lot easier when the meat is still fresh and wet as opposed to dry and settled.
Seasoning the Meat
13. Use the Right Amount of Salt
The right amount and type of salt are important for both taste and curing—removing dangerous bacteria. Salting requirements differ with the type of sausage.
It all boils down to the length of storage. Let’s look at the two main types of bangers in this regard:
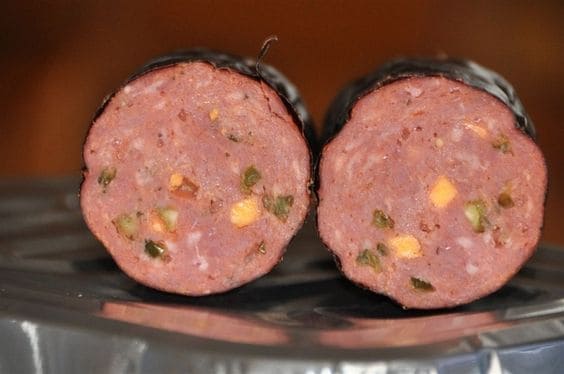
Fresh sausages
Fresh sausages, smoked or boiled, are not heat-treated. They are instead sold raw. Traditionally, you don’t cure fresh sausages. That doesn’t mean they don’t need salt, though. You add a little salt, but only for taste.
These bangers are typically made of minced meat, fat, spices, and salt stuffed into a casing. It’s up to the consumer to cook them before eating.
For these sausages, best practice is to add about 2 grams of salt per 100 grams of meat.
WARNING
Since Fresh sausages are not cured, they contaminate very easily. Store them carefully and ensure you cook them until they are done.
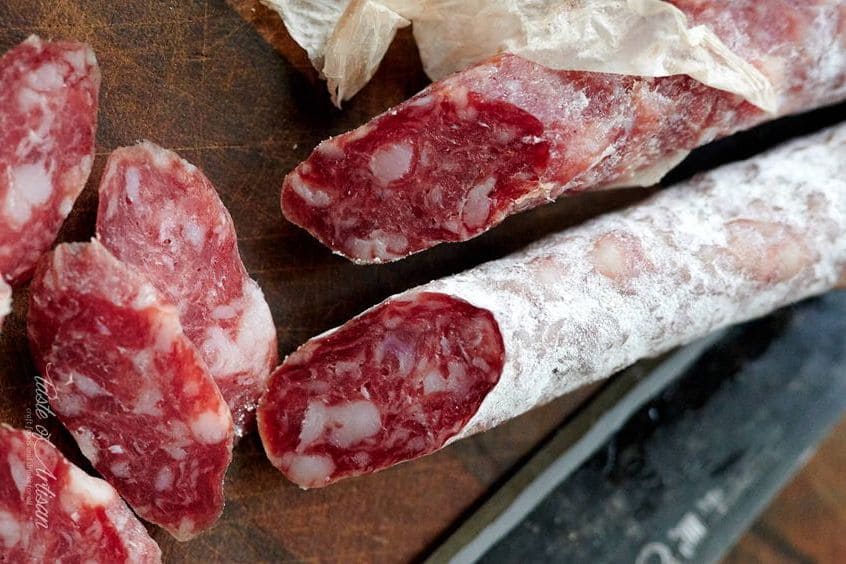
Dry-Cured Sausages
Dry-curing sausages, or meat in general, is a bit of a science experiment. At its core, you’re preserving uncooked meat by letting it dry slowly without getting contaminated by harmful bacteria.
A common dry-cured sausage is salami. It’s salty and a little dry but in a good way.
To cure bangers, you need a special curing salt containing sodium nitrate or sodium nitrite—pink salt. It kills bacteria and keeps the sausages free of contamination. Without it, your bangers are nothing short of sweet-smelling food poisoning hazards.
These types of salts generally come in combinations containing roughly 0.2% sodium nitrate. Don’t use too much curing salt because it can be dangerous to eat. As a general rule, use two tablespoons of curing salt per 2.2 pounds of meat. Mix it with some water and distribute it evenly through the meat.
WARNING!!!
Dry curing is a rewarding project, but it can go wrong if you’re not careful.
If you leave the meat to dry without curing it correctly, dangerous food poisoning bacteria, such as Clostridium botulinum, strike. They love the warm, oxygen-free center of the sausages.
These bacteria make you sick, and in rare cases, can be fatal.
In the case of botulinum, the toxin attacks the body’s nerves. Symptoms generally begin with the weakness of muscles around the eyes, face, throat, and mouth. As the toxin spreads, the frailty affects the neck, arms, torso, and then the legs.
In some cases, it affects the muscles involved in breathing, leading to death if not treated.
14. Always Use Non-Iodized Salt in Sausage Making
There’s one last point we need to make on salting: Never use iodized salt when making sausages. It gives them a metallic taste, which is very unpleasant.
15. Always Use Prepared Spices and Herbs
When cooking, you probably prefer fresh herbs from your garden. Your garden herbs are excellent for general meals. However, in sausage making, these herbs are a no-no.
Fresh herbs may contain bacteria. They could introduce bacterial activity that would ruin your sausages in a couple of hours.
Only use sterile spices and herbs bought from the store.

16. Use Precise Scales
When making sausages, precise measurements are vital, especially with cures. For this, you need an electronic scale, ideally one that measures grams and ounces. If you don’t have an electronic scale and don’t want to purchase one, use measuring cups.
Using too little or too much curing salt can be dangerous. It may be worthwhile to invest in an electronic scale if you’ll be making sausages frequently.
17. Use Wine Sparingly
Wine is a great additive when cooking meat. It adds depth to the flavor.
In sausages, however, it’s best to use it sparingly. Too much wine can alter meat texture, making your sausages crumble. This is because wine denatures binding proteins, including myosin and actin.
Pro-Tip
If you choose to add wine, go for dry wine, not the fruity or sweet variants. Use an atomizing spritzer to spray the wine onto the meat while it’s still cold. This way, you’ll distribute the wine evenly without using too much.
18. Avoid Disturbing the Binding Proteins
When adding spices and flavors, you need to be careful not to add any ingredient that will disturb the binding proteins prematurely.
To achieve the optimal sausage texture, we need those binding proteins, actin and myosin, to develop properly. Some ingredients, however, can alter this process if added too early. Acidic foods, like tomato or vinegar, should be introduced last as they may denature the proteins.
After adding all the ingredients, don’t mix the mince too long. That also alters the textures.
Stuffing the Sausages
19. Use Cold Meat, Casings, and Equipment
Keeping the meat cold and firm makes it a lot easier to stuff. As with grinding, you want to do it in small batches, leaving some portions in the freezer or cold-water bath.
Likewise, at least 30 minutes before you start stuffing, place the casings and the machine into the freezer. In my experience, cold casings don’t tear easy.
20. Understand Your Casings
Casings dictate shape, size, and some variants even add flavor. Your choice of casing should be informed by the type of banger you plan to make.
You have roughly three types of casings to choose from:
- Natural casings: These are typically made from either pig, cow, or sheep intestines. Natural casings are fantastic for added flavor, but not everyone is comfortable working with them.
- Collagen casings: Although these are also natural casings, they’ve undergone a lot more processing. Still, they’re great for sausages and common in salami and bologna.
- Cellulose casings: These are plant-based, made from plant cell walls. They are translucent and exceptionally resilient. You can use them with meat-based sausages, but they’re best with vegetarian recipes.
Casing choice is typically a matter of preference. The most common variety you’ll find in shops is probably pork casings. These work well with various recipes and are easy to handle. Shop around specialty stores or online on sites like Amazon for more variation.
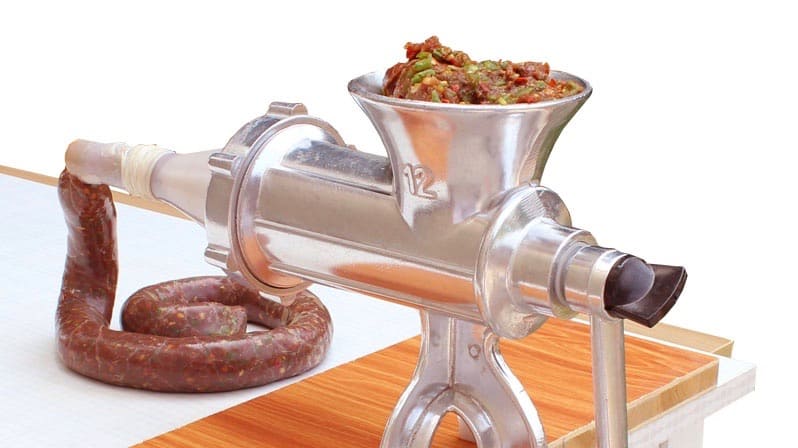
21. Prepare the Casings
Prepare the casings by running some water over them to remove any residual salt. After this, place the casing in a bowl with water. Try to drape one end over the side of the bowl. If you don’t, it’ll be quite tricky to find the openings.
When working with the casings, be gentle—even a small tear can destroy an entire roll. Be on the lookout for damages and cut out the affected sections.
22. Avoid Air Pockets
The best way to prevent air pockets is by squeezing meat into the stuffer using your fist. Also, ensure that the pressure relief valve on the stuffer is working correctly.
Another thing you can do, if you’re using a stuffer with a canister, is to pack the meat in at an angle. Alternately tilt the canister to the left and right as you put you introduce the mince. This allows you to pack the meat tightly, removing air pockets.
That said, for your first few sausages, air pockets are hard to avoid. Use a thin needle to pierce the casing in several places immediately after stuffing it. But be careful not to damage the sausage.
23. Hold Lightly to Prevent Popping Casings
Once you get stuffing, you might hear the dreaded ‘pop’ of the casing, leaving meat spread over the counter.
To prevent this, don’t hold the casing too tight around the tube. Use a light hand and let the stuffer do the rest.
Cooking Sausages
24. Preheat the Empty Smokehouse
If you’re smoking your sausages, preheat the smokehouse, or smoker, while empty. Once it’s warm, add the sausages and gradually raise the temperature. Up the heat by a few degrees every 20 to 30 minutes, over several hours. Gradual heating keeps the fat from melting.
25. Store Overnight Before Cooking
If you opt for fresh sausages, the best thing to do is leave them overnight in the fridge. This allows all the spices to marry and intensify, enhancing the flavors.
Storing Sausages
26. Wrap Tightly
Wrap your sausages tightly or place them in an airtight container. This preserves their flavors and textures. Air also encourages bacterial activity, so it’s best to keep your bangers protected.
27. Fridge or Freezer
If you plan to eat the sausages within four to five days, place them in the fridge. However, for longer storage time, the freezer is best to avoid contamination.
Although not always possible, it’s best to decide quickly how soon you’ll consume your sausages. The longer you leave your sausages in the fridge, the higher the chance of contamination, even if you were to freeze them afterward.
In a Nutshell
Each step of the sausage-making process has an impact on the final texture and flavor. Outlined are the best practices that have always worked for me.
Is there something we missed?